4 minutes time to read
This article will guide you on how to access the list of inspection forms in Moralius, view/edit an existing inspection form, or build a new one.
To go to the asset list screen, simply follow the steps below:
- Click on your icon on the top-right part of the screen.
- Click on ‘Admin’.
- Click on the ‘Inspection Forms Builder’ tab on the left part of the screen.
How to add an inspection form
If you want to build a new inspection form template, simply follow the steps below:
- Click on the + button on the top-right part of the screen.
- Fill in all necessary information in the 'Basic Data' section.
- Fill in all necessary information in the 'Sections' section.
- Click on 'Save Draft' to save the template as an inactive form without validating your input.
- Click on 'Publish' to validate your input and save the template as an active form.
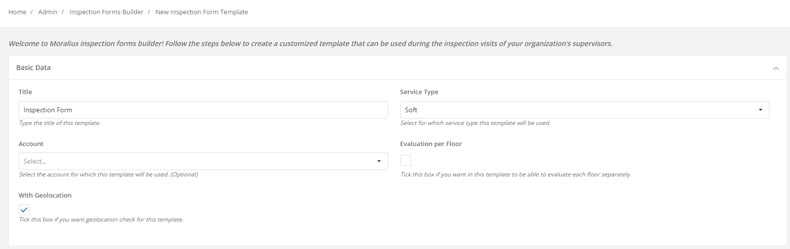
In the 'Basic Data' section, the following steps should be completed:
- In the 'Title' box, type the title of the template.
- In the 'Service Type' box, select the service for which the template will be used.
- In the 'Account' box, select the account for which the template will be used.
- In the 'Evaluation per Floor' box, select if you want in this template to be able to evaluate each floor separately.
- In the 'With Geolocation' box, select if you want this template to be able to use geolocation check.
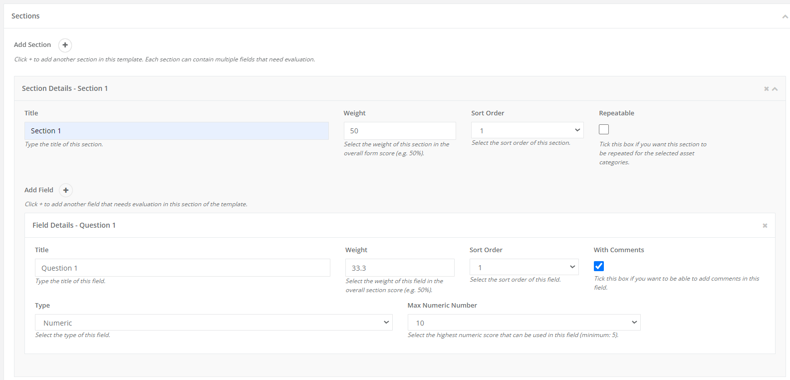
In the 'Sections' section, the following steps should be completed:
- In the 'Add section' option, click on + to add a section to the template.
- In the 'Title' box, type the title of the section.
- In the 'Weight' box, select the weight of the section in the overall inspection form score.
- In the 'Sort Order' box, select the order in which the section will be displayed.
- In the 'Repeatable' box, select if you want the section to be repeatable for the selected asset categories.
- In the 'Add field' option, click on + to add a field in the template.
- In the 'Title' box, type the title of the field.
- In the 'Weight' box, select the weight of the field in the overall section score.
- In the 'Sort Order' box, select the order in which the field will be displayed.
- In the 'With Comments' box, select if you want to able to add comments in the field.
- In the 'Type' box, select the response type of the field (numeric, percentage, short answer)
- If the selected 'Type' is 'numeric', in the 'Max Numeric Number' box, select the highest numeric score that can be used in this field.
- If the selected 'Type' is 'percentage', in the 'Percentage Step' box, select the percentage step that will be used for the score of the field.
- If the selected 'Type' is 'short answer', in the 'True text' box, select the text that will be treated as 'true' and in the 'False text' box, select the text that will be treated as 'false'.
To delete a section or field, click on the x button on the top-right of the respective section / field.
How to view/edit an inspection form
In order to view or edit an inspection form template, simply follow the steps below:
- Click on the pencil icon of the record that you want to edit.
- Change the information that you want.
- Click on the ‘Save’ button.
Note that, if the template has been used, the only fields that are editable are the template's title, the section's sort order and the field's sort order.
How to delete an inspection form
In order to delete an inspection form template, simply follow the steps below:
- Click on the bin icon of the record that you want to delete.
- In the popup that appears, click on ‘Yes’.
How to copy an inspection form
In order to copy an inspection form template from the list of inspection forms, simply follow the steps below:
- Click on the box on the left of the template that you want to copy.
- Click on the
 icon on the top-right part of the screen.
Related articles
Read this article to see how you can filter and sort the data of this screen, or even select which columns will appear.