6 minutes time to read
This article will guide you on how to view or edit an existing service in Moralius.
How to view/edit a service
o view or edit a property, simply follow the steps below:
- Click on ‘Property Management’ on the menu on the left part of the screen.
- Click on ‘Services'.
- Select the service you want to view or edit and click the pencil/eye icon (depending on your role permissions) at the right of the row.
- Change the fields that you want.
- Click on ‘Save’ if you want to save any changes.
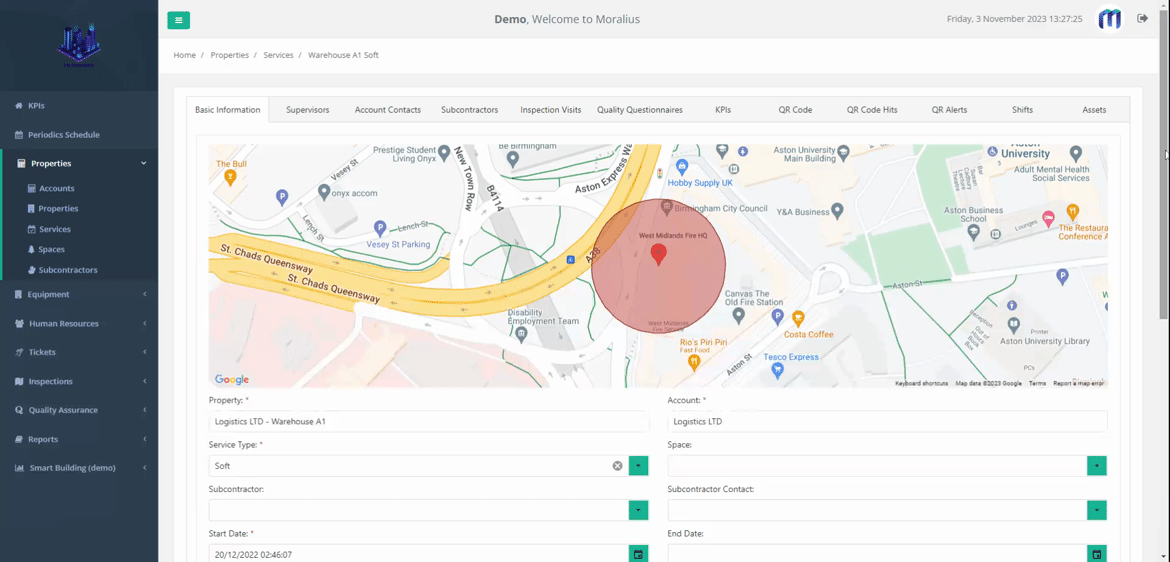
Basic information
On the ‘Basic Information’ tab you can view/edit the following fields:
- Property
The name of the property linked to the service.
- Account
The name of the account linked to the service.
- Service Type
The type of service, e.g. ‘Hard’.
- Space
The name of the space linked to the service.
- Subcontractor
The full name of the subcontractor linked to the service.
- Subcontractor Contact
The full name of the subcontractor contact linked to the service.
- Start Date
The start date of the service.
- End Date
The end date of the service.
- Minimum Inspection Visits Required per Month
The minimum number of inspection visits that should be performed for this service each month.
- Service Code
The code of the service.
- Corrective Actions Resolve Time (Hours)
The time (in hours) in which a corrective action linked to this service should be resolved.
- Service Request Resolve Time (Hours)
The time (in hours) in which a service request linked to this service should be resolved.
- Total Inspection Visits (non-editable)
The total number of inspection visits that have been performed for this service.
- Total Hours On Site (non-editable)
The total duration of the inspection visits that have been performed for this service.
- Grade of Customer (non-editable)
The average grade provided by the customer for this service.
- Address (non-editable)
The address of the property linked to the service. The address cannot be edited through this screen. To see how to edit the address of the property, check this article.
- Active
Shows whether this service is active or not.
Supervisors
On the ‘Supervisors’ tab you can view/edit the following fields:
- Supervisor
The full name of the supervisor.
- Primary (non-editable)
Shows whether this supervisor is the primary one for this service.
- Active (non-editable)
Shows whether this supervisor is active or not.
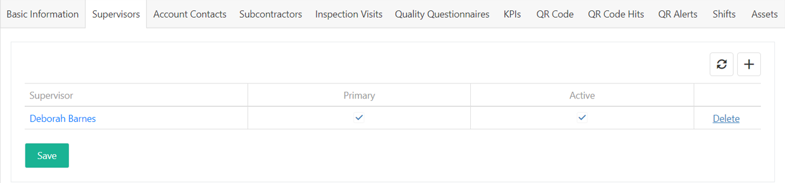
If you want to delete a supervisor linked to the service, follow the steps below:
- Click on 'Delete' on the row of the supervisor that you want to delete.
- Click on 'Yes'.
- Click on 'Save'.
If you want to add another supervisor to the service, follow the steps below:
- Click on the + icon.
- Select the supervisor that you want to add.
- Tick the 'Primary' checkbox if this supervisor will be the primary one for this service.
- Click on 'Save' on the popup screen.
- Click on 'Save'.
Account Contacts
On the ‘Account Contacts’ tab you can view/edit the following fields:
- Account Contact
The full name of the account contact.
- Primary (non-editable)
Shows whether this account contact is the primary one for this service.
- Active (non-editable)
Shows whether this account contact is active or not.
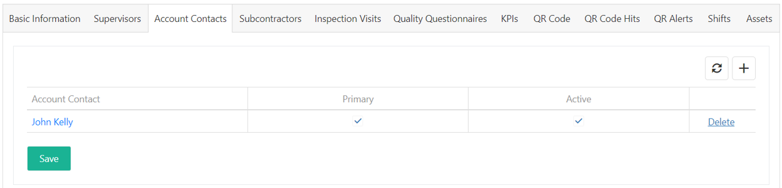
If you want to delete an account contact linked to the service, follow the steps below:
- Click on 'Delete' on the row of the account contact that you want to delete.
- Click on 'Yes'.
- Click on 'Save'.
If you want to add another account contact to the service, follow the steps below:
- Click on the + icon.
- Select the account contact that you want to add.
- Tick the 'Primary' checkbox if this account contact will be the primary one for this service.
- Click on 'Save' on the popup screen.
- Click on 'Save'.
Subcontractors
On the ‘Subcontractors’ tab you can view/edit the following fields:
- Subcontractor
The full name of the subcontractor.
- Active (non-editable)
Shows whether this subcontractor is active or not.
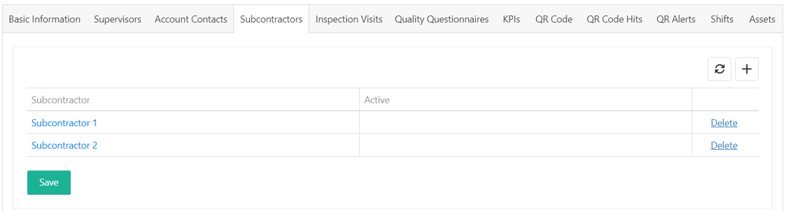
If you want to delete a subcontractor linked to the service, follow the steps below:
- Click on 'Delete' on the row of the subcontractor that you want to delete.
- Click on 'Yes'.
- Click on 'Save'.
If you want to add another subcontractor to the service, follow the steps below:
- Click on the + icon.
- Select the subcontractor that you want to add.
- Click on 'Save' on the popup screen.
- Click on 'Save'.
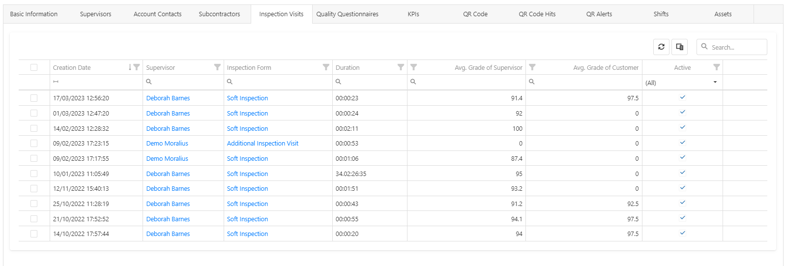
Inspection Visits
On the ‘Inspection Visits’ tab you can view the inspection visits performed for the service with the following fields:
- Creation Date
The date and time when the inspection visit was created.
- Supervisor
The full name of the supervisor that is linked with the service.
- Inspection Form
The inspection template used.
- Duration
The duration of the inspection visit.
- Grade of Supervisor
The average grade provided by the supervisor.
- Grade of Customer
The average grade provided by the customer.
- Active
Shows whether the service is active or not.
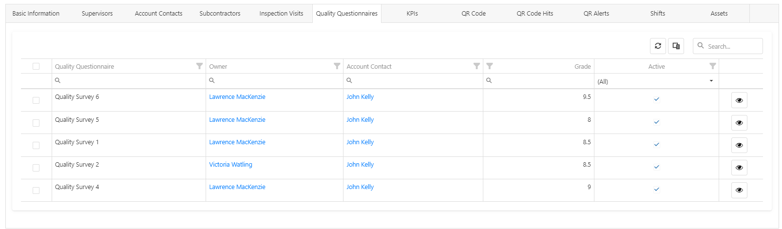
Quality Questionnaires
On the ‘Quality Questionnaires’ tab you can view the quality questionnaires linked to the service with the following fields:
- Quality Questionnaire
The name of the quality questionnaire.
- Owner
The full name of the owner of the quality questionnaire.
- Account Contact
The full name of the account contact.
- Grade
The grade of the quality questionnaire.
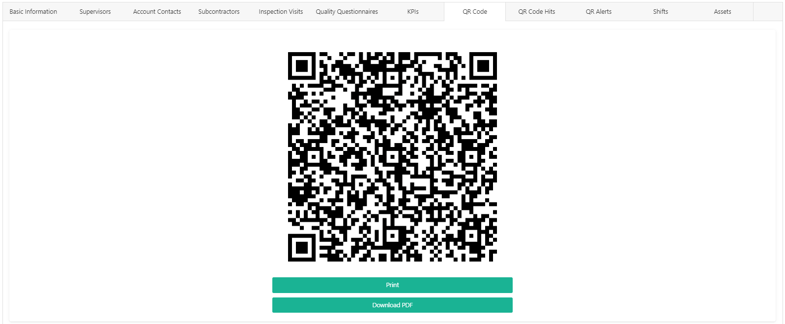
QR Code
On the ‘QR Code’ tab you can view the QR code of the selected service. You can also choose to print or download the QR code as a PDF.
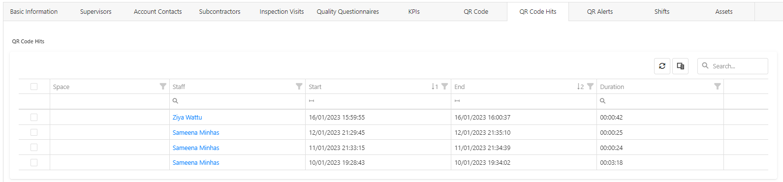
QR Code Hits
On the ‘QR Code Hits’ tab you can view the recorded QR code hits for the selected service with the following fields:
- Space
The space at the QR code hit took place.
- Staff
The full name of the staff who performed the QR code hit.
- Start
The start date and time of the QR code hit.
- End
The end date and time of the QR code hit.
- Duration
The duration between the start and the end of the QR code hit.
QR Alerts
On the ‘QR Alerts’ tab you can view any QR code alerts recorded for this service.
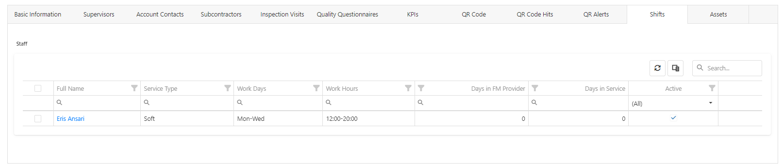
Shifts
On the ‘Shifts’ tab you can view the shifts of the staff linked to this service.
Related articles
Read this article to see how you can filter, sort and export the data of these screens, or even select which columns will appear.