2 minutes time to read
This article will guide you on how to view or edit a corrective action in Moralius.
How to view/edit a corrective action
To view or edit a corrective action, simply follow the steps below:
- Click on ‘Tickets’ on the menu on the left part of the screen.
- Click on ‘Corrective Actions’.
- Select the corrective action you want to view or edit and click the pencil/eye icon (depending on your role permissions) at the right of the row.
- Change the fields that you want.
- Click on ‘Save’ if you want to save any changes.
Fields
On this screen you can view/edit the following fields:
- Title
The title of the ticket.
- Service
The service the ticket is linked to.
- Account Contact
The full name of the account contact linked to the ticket.
- Owner
The full name of the owner of the ticket.
- Status
The status of the ticket.
- Creator
The full name of the creator of the ticket.
- Creation Date
The date the ticket was created.
- Description
A description of the ticket.
Also, on this screen you can do the following:
- Download an attachment. To do this, click on the attached file name under 'Attachments'.
- Upload an attachment. To do this, click on 'Select attachment' and select the file you want to attach.
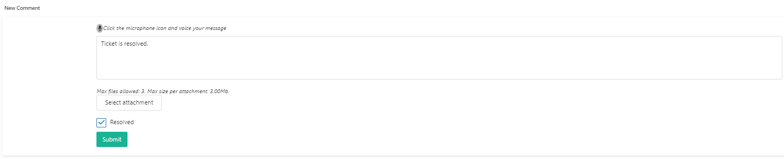
- Read any included comments in the 'Comments' section on the bottom part of the screen.
- Add a comment by typing text in the 'New Comment' section and then clicking on 'Submit'. You can also add an attachment to your comment by clicking on 'Select attachment' and selecting the file you want to attach.
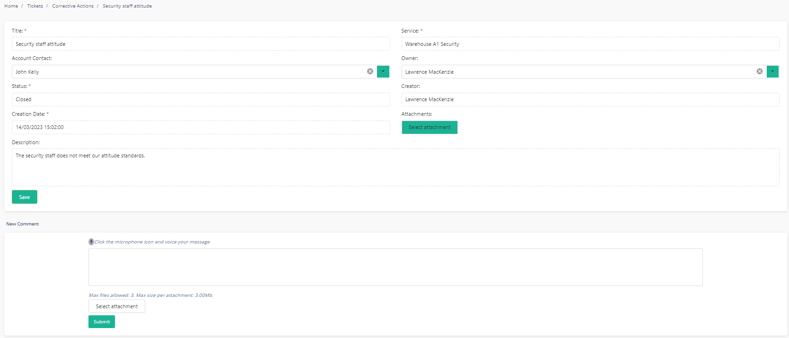
- Resolve the ticket. To do this (you need to be the owner of the ticket), add a comment by typing text in the 'New Comment' section, tick the 'Resolved' box and then click on 'Submit'.