3 minutes time to read
This article will guide you on how to view or edit an asset in Moralius.
How to view/edit an asset
To view or edit an asset, simply follow the steps below:
- Click on ‘Equipment’ on the menu on the left part of the screen.
- Click on ‘Assets’.
- Select the asset you want to view or edit and click the pencil/eye icon (depending on your role permissions) at the right of the row.
- Change the fields that you want.
- Click on ‘Save’ if you want to save any changes.
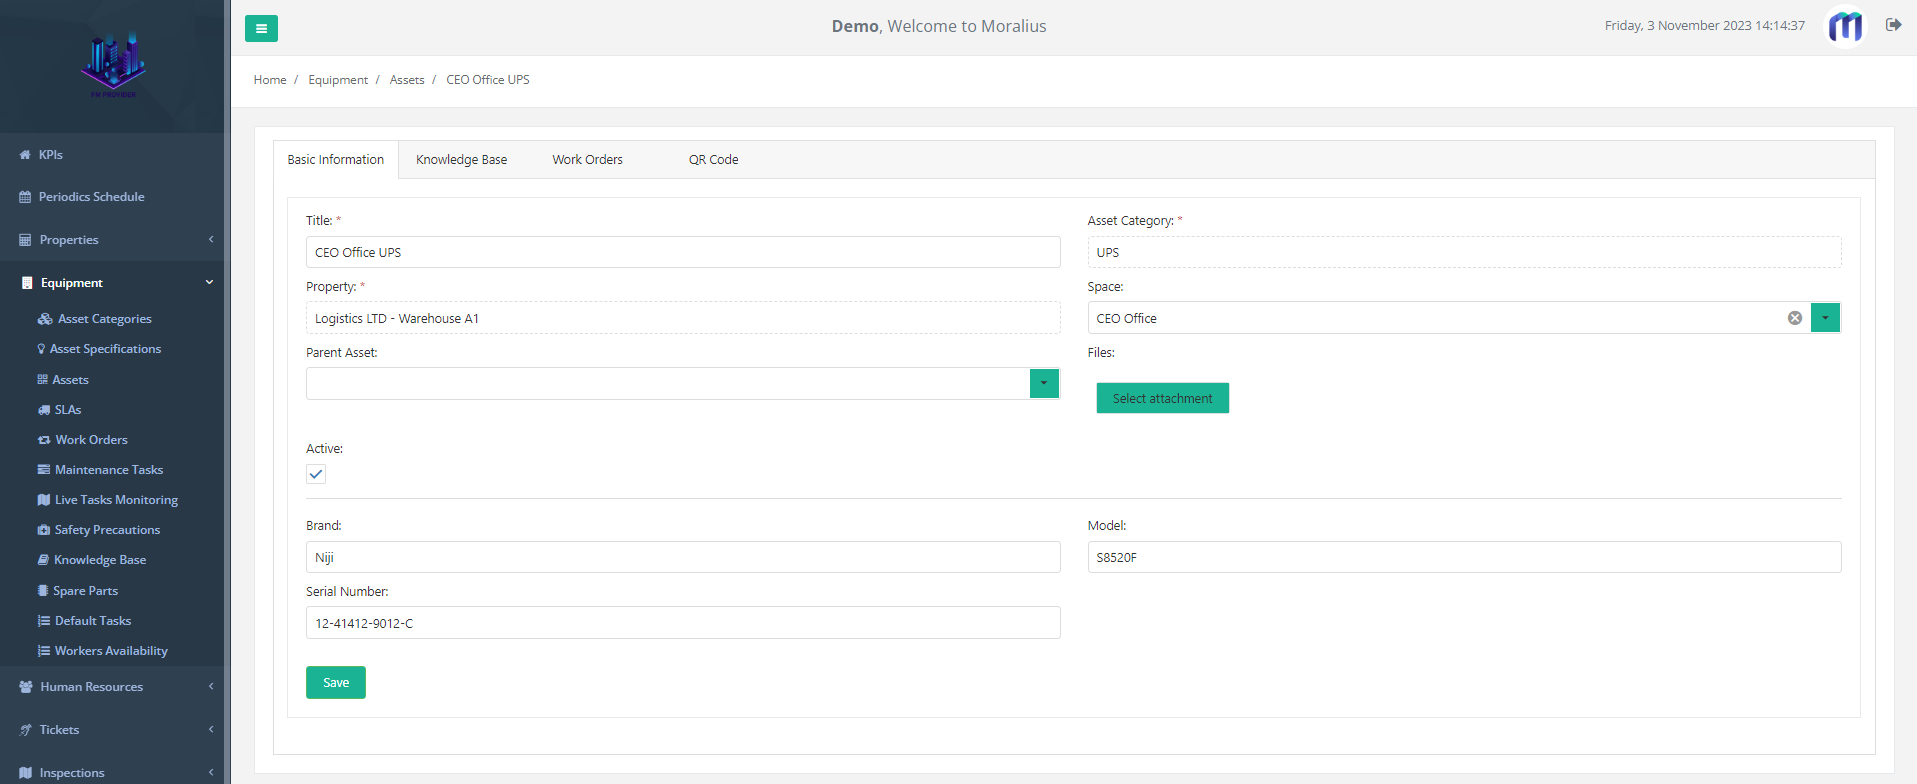
Basic information
On the ‘Basic Information’ tab you can view/edit the following fields:
- Title
The title of the asset.
- Asset Category
The category of the asset.
- Property
The property to which the asset belongs.
- Space
The space to which the asset belongs.
- Parent Asset
The parent of the asset.
- Active
Shows whether the asset is active or not.
Also, based on the selected asset category, additional fields will appear.
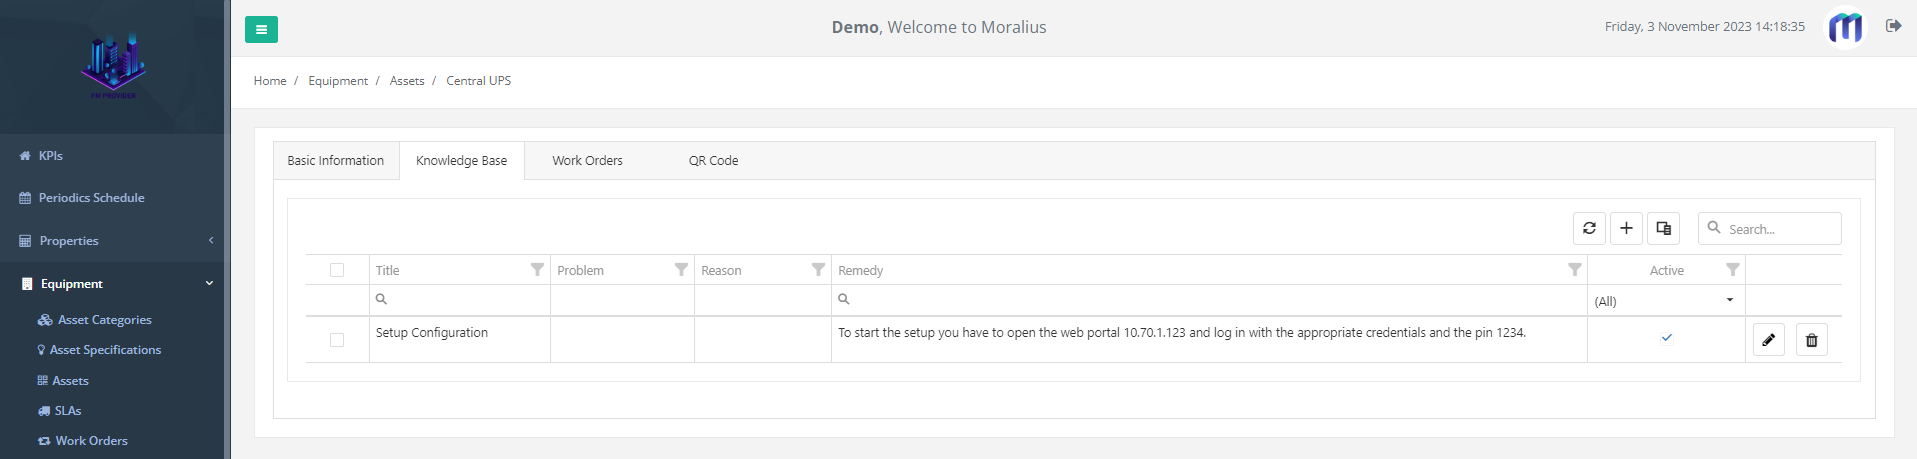
Knowledge Base
On the ‘Knowledge Base’ tab you can view and edit the knowledge base records linked to the asset and also add a new one.
To see more information on the knowledge base records list, check this article.
To see how to view/edit a knowledge base record, check this article.
To see how to add a new knowledge base record, check this article.
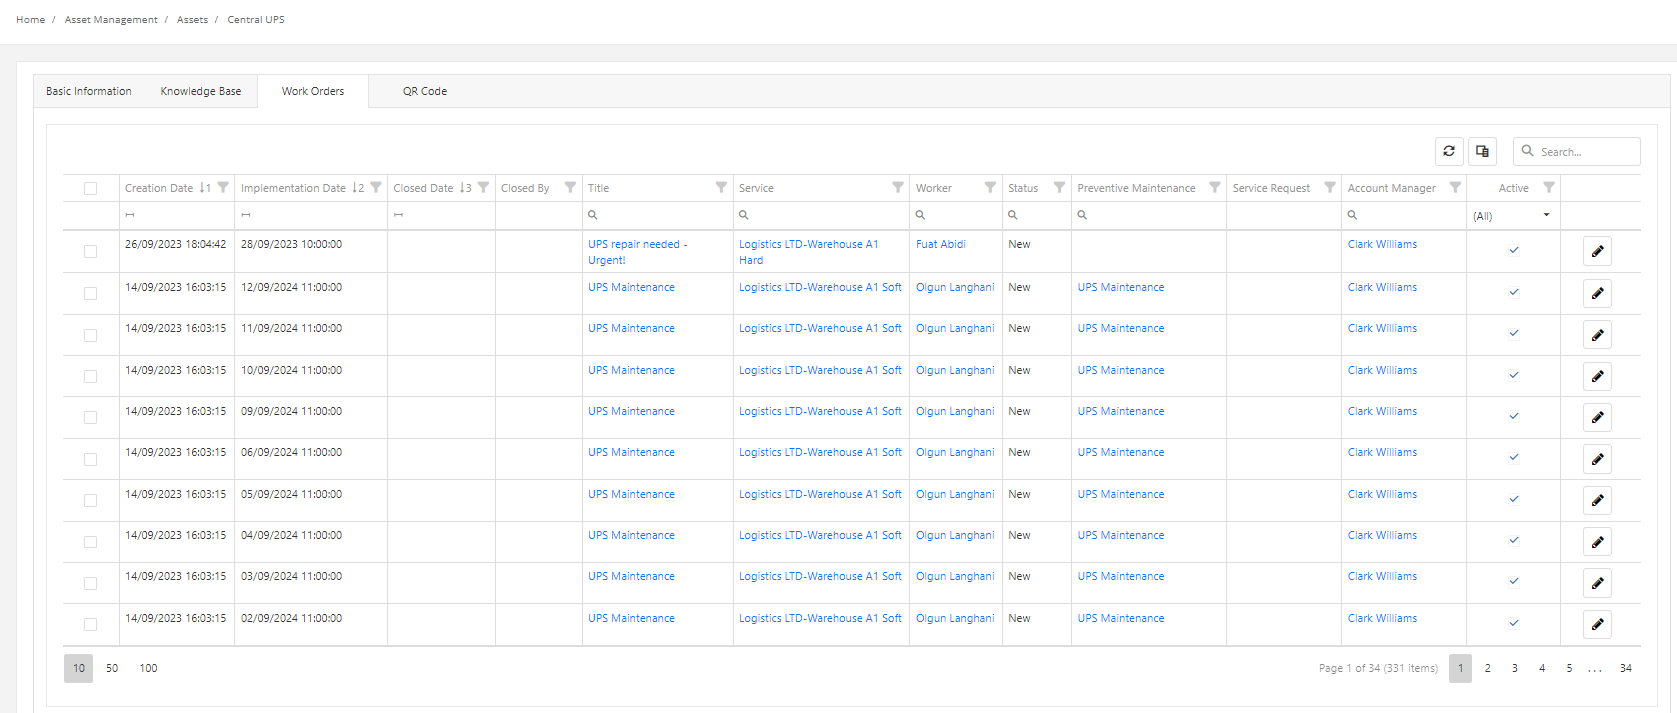
Work Orders
On the ‘Work Orders’ tab you can view and edit the work orders linked to the asset and also add a new one.
From this tab, you can navigate to the Preventive Maintenance or Service Request linked to each work order, by clicking on the specific hyperlink on the Preventive Maintenance or Service Request columns respectively.
To see more information on the work orders list, check this article.
To see how to view/edit a work order, check this article.
To see how to add a new work order, check this article.
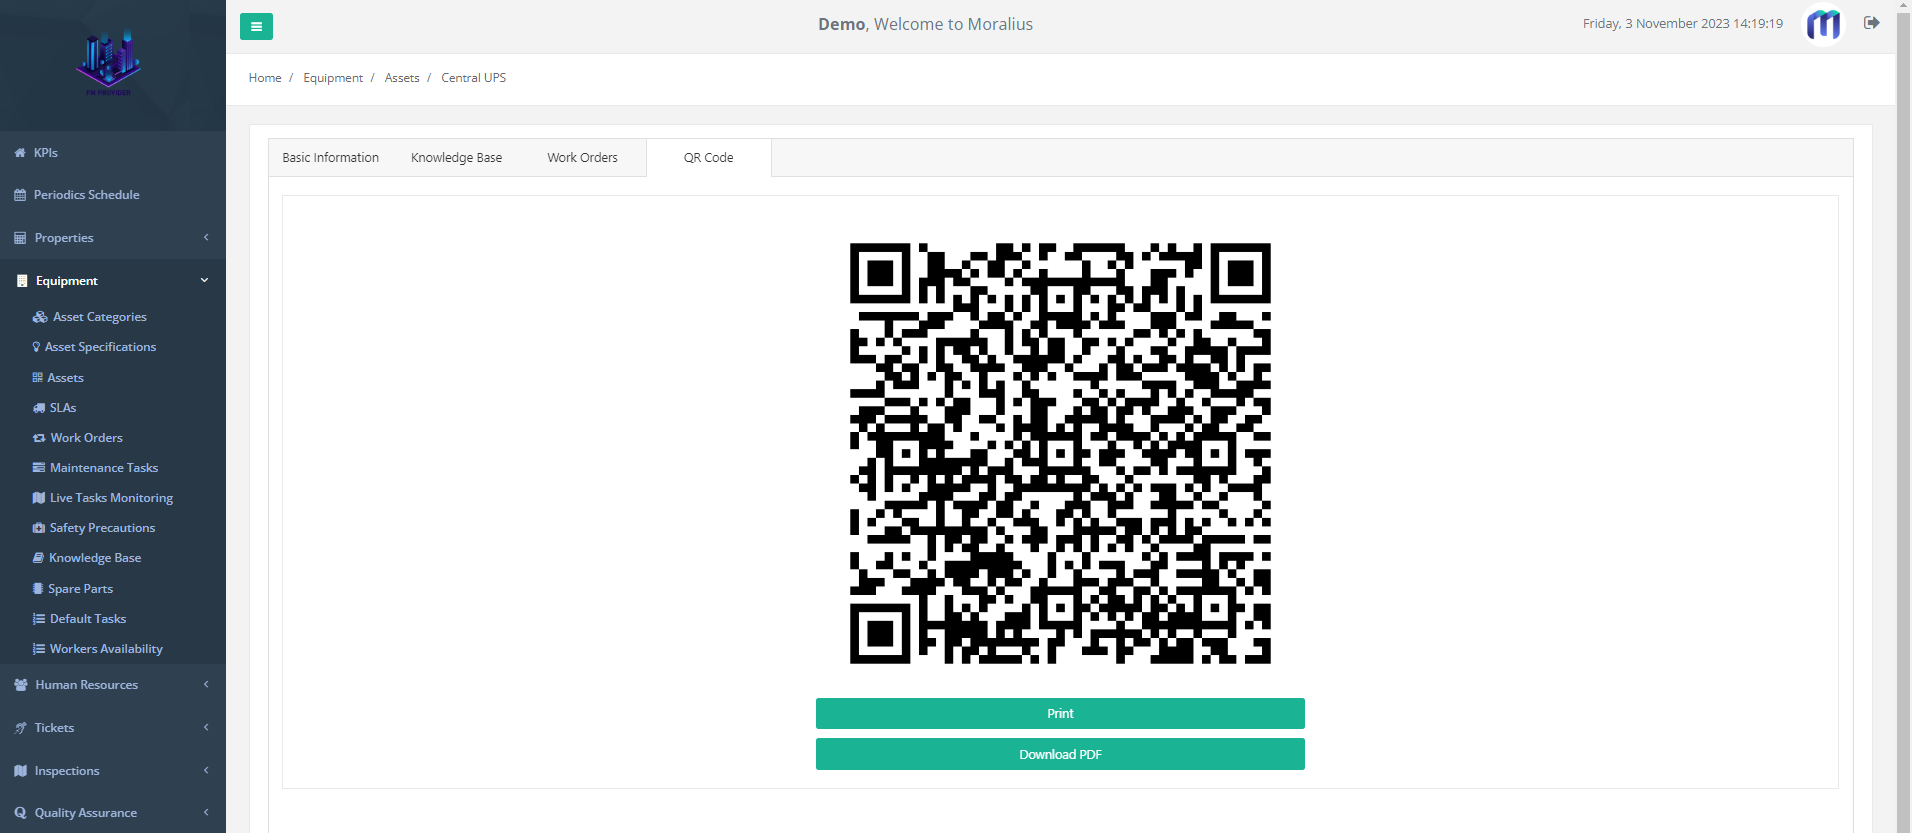
QR Code
On the ‘QR Code’ tab you can view the QR code of the selected asset. You can also choose to print or download the QR code as a PDF.
Related articles
Read this article to see how you can filter and sort the data of these screens, or even select which columns will appear.